-
Mobile Version
Scan with Mobile
- Member Center
 394
394
Fit tolerance refers to the sum of hole and shaft tolerances that make up the fit. It is the variation of allowable clearance or interference. The size and position of the tolerance zone of the hole and shaft constitute the fit tolerance. The size of hole and shaft fit tolerance indicates the fit accuracy of hole and shaft. The size and position of the hole and shaft fit tolerance zone represent the fit accuracy and fit nature of the hole and shaft. Size of fit tolerance = size of tolerance zone; Fit tolerance zone size and location = fit nature.
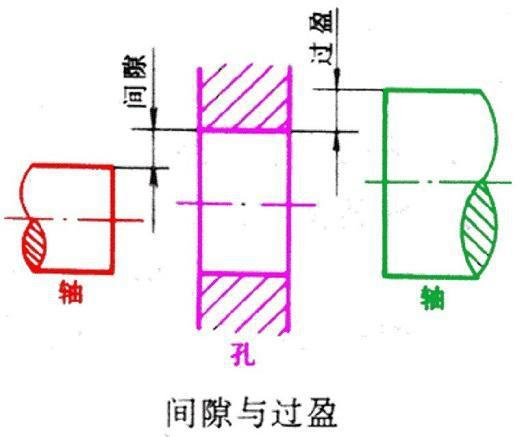
Tolerance fit is divided into clearance fit, transition fit and interference fit.
In clearance fit, there is a gap between the hole and the shaft. The tolerance zone of the hole is above the tolerance zone of the shaft, that is, the actual size of the hole is always greater than or equal to the actual size of the shaft. Clearance fit is usually used for the fit with relative movement of the joint, and can also be used for general positioning fit.
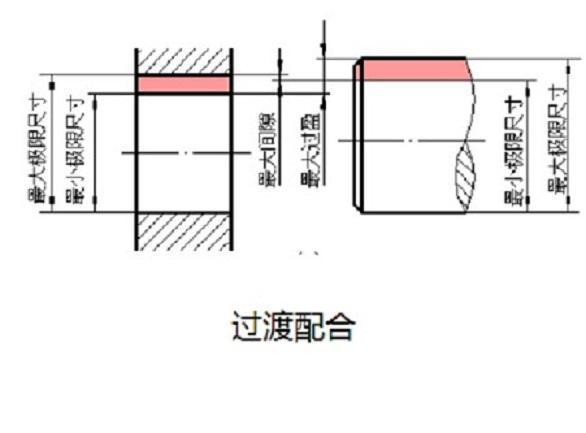
In transition fit, there are two possibilities for the position of hole and shaft, either interference or clearance. The tolerance zone of hole and shaft overlap each other. The maximum limit size of shaft is greater than the minimum limit size of hole, and the minimum limit size of shaft is less than the maximum limit size of hole. It is usually used to locate a relatively static connection that needs to be disassembled accurately. In interference fit, there is interference between the position of the hole and the shaft, that is, the difference between the size of the hole minus the size of the matched shaft is negative. Depending on the interference between the shaft and the hole, the elastic pressure is generated between the parts' surfaces after assembly, so as to obtain a tight connection. When the interference is small, the key connection is used to transmit torque; When the interference is large, the torque is transmitted by the binding force of the hole shaft.

